
TIPS & TRICKS
5 Tips for a Flawless Entity Dip or Brush Manicure
Dip manicures have exploded in popularity over the last several years thanks to their long-lasting and durable finish. But for a long time, they were relegated to salons, applied only by nail professionals. No longer! Now, with the right tools and techniques, you can create a gorgeous and strong Entity Dip or Brush manicure in the comfort of your own home. Simply follow these expert tips to achieve a professional-looking dip manicure without ever stepping foot in a salon.

1. Prep Nails
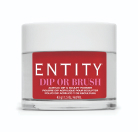
Arguably the most important step, correctly prepping the nails ensures that your manicure will last without chipping or lifting. Start by shaping your nails and gently pushing back your cuticles. After filing the edge of your nails, lightly remove the natural shine from your nails by gently filing the nail plate with a 180-grit buffer. Don’t be too aggressive here; if you overly file the surface of your nails, you can make them too thin and weak. Then, cleanse nails with 99% isopropyl alcohol to remove any oils and residue. Now you’re ready to apply one thin coat of Dip or Brush Prep (#1). This will remove excess oil and moisture from the nail plate to encourage proper adhesion.
2. Apply Base Coat
The Entity Dip or Brush Base Coat creates a strong foundation to help the dip powder adhere to the nail. Plus, Dip or Brush Base Coat contains vitamins A and E, as well as calcium to help protect the natural nail while you’re wearing dip nails. Working on one nail at a time, apply a thin and even coat of Dip or Brush Base Coat (#2) to the nail, avoiding the cuticle area. One of the biggest complaints of doing dip nails is that they peel or lift, and this often is the result of flooding the cuticles with too much product. Make sure to wipe the brush on the edge of the bottle before applying it to the nail. Then, when applying it to the nail, leave a small margin between the cuticle and your nail. While you’re still getting familiar with the consistency of the Base Coat, it’s a good idea to begin your application at the center of the nail, and then use the brush to work back toward the cuticle, getting close but not touching it.
3. Master the Dip Technique
After applying Base Coat comes the exciting part: Adding the color dip powder. The traditional method involves dipping the nail into the Dip or Brush Powder at a 45-degree angle. However, you can also pour the powder over your nail, just be sure to have a small bowl or receptacle below to catch the fallout. After coating the nail with powder, gently tap off the excess. This gentle tapping motion ensures even distribution of powder across the nail and helps avoid clumps. Brush off any remaining powder with a stiff bristled nail brush. Then, repeat with a second coat of Dip or Brush Base Coat, and dip into the powder or pour over once again, tapping off the excess. Remember to cap the free edge (tip) of your nail with Base Coat and Powder to added strength and to help avoid chipping.
4. Perfect Activator Application
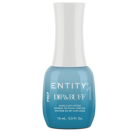
One of the most crucial steps of the process is applying activator, as this hardens the powder and creates a durable finish. Activator works to increase flexibility of the product to keep the nail from cracking, while also reducing discoloration and yellowing. Wipe the side of your brush on the bottle edge, then apply a thin layer of Dip or Brush Activator (#3) to the nail making sure to coat the entire nail, and allow it to dry.
5. Seal and Protect
Before moving to the last step, use the 180-grit side of a buffing file to smooth any lumps or bumps and to shape the nail. If you’re using a new, unused file, make sure to prep it by softening the edges of it using another file. This will smooth the edges of your new file so that you don’t risk cutting the delicate skin around your nail as you shape it. Remember, if you work in thin, even layers and use the Base Coat sparingly, then you should have a fairly smooth surface and won’t need to do anymore than refine the surface of the nail. Remove any excess dust from the nail with your nail brush, and apply one more layer of Dip or Brush Activator. Use a clean, dry, lint-free pad to remove any excess Activator. Finally, apply two thin layers of Dip or Brush Top Coat (#4), allowing it to dry completely between coats. This final step gives your nails a glossy, color-enhancing finish.
By using these simple steps — combined with some practice and patience — before long, you’ll be enjoying long-lasting, beautiful nails that rival salon results, right in the comfort of your own home!
Products mentioned
 DIP OR BRUSH POWDER
 PREP
PREP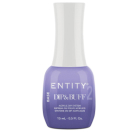 BASE COAT
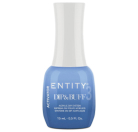 ACTIVATOR
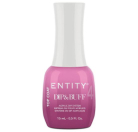 TOP COAT
 PERFECT FRENCH DIP JAR