
TIPS & TRICKS
Say Goodbye to Chipped and Smudged Polish With These Pro Tips
We all love the look of freshly polished nails, but there’s nothing more frustrating than finding a chip on one (or more!) nails on Day 2 of wear. If this has happened to you (and let’s be honest, who hasn’t this happened to?), we’ve got some essential tips and tricks from nail professionals that will keep your at-home manicure from chipping and peeling, ensuring that your perfectly polished nails stay pristine longer.

The Manicure
Start With Clean Nails Before applying nail polish, it’s crucial to make sure that your nails are clean and free from debris. Remove any existing nail polish with a lint-free wipe (or cotton ball in a pinch) and acetone. If wearing glitter or dark-colored polish, let the acetone-saturated wipe sit on your nail for a few seconds before gently rubbing it against the surface of the nail. This will help loosen the tough glitter particles or polish for easy removal.
Nail Prep
While it may seem like a needless extra step, focusing on nail preparation will ensure that your polish adheres well and lasts longer. Trim (if desired) and shape nails using a 180-grit or higher file. Push back cuticles. If you have overgrown cuticles on your nail plate, consider using cuticle softener to help push back that dead skin. Even when applying lacquer, it’s a good idea to gently buff the surface of your nails to encourage adhesion. Use a 180-grit buffer and light pressure; pushing too hard or filing too aggressively can remove the top layers from your nail plate resulting in damage. Remove any leftover dust and debris with isopropyl alcohol.
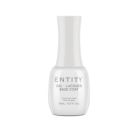
Apply Base Coat
Entity Gel-Lacquer Base Coat acts not only as a protective layer between your nails and the polish, but it also works like double-sided tape, bonding with the oligomers in the color coat for a lasting manicure. Wipe one side of the brush on the edge of the bottle before applying a thin, even layer to the nail. Make sure that the entire surface of the nail is covered, including the free edge (tip), and that you don’t have too much Base Coat floating on the nail.
Master the Layering Technique
When applying Entity Gel-Lacquer, you always want to use thin layers. If the polish goes on too thick, it not only takes longer for it to dry, but it makes your manicure more prone to chipping and peeling. If you’re looking for more opacity, applying more thin layers will get the color payoff you’re looking for without compromising the wear. Wipe off one side of the brush on the edge of the bottle, then apply Gel-Lacquer in three strokes: one down the middle and one on each side. For the first stroke, start with your brush a couple of millimeters away from the cuticle and allow the brush to fan out. Then gently push the brush back towards your cuticle without touching it. Next, bring the brush down the length of your nail. This will ensure that you don’t get polish on the cuticles, which can cause peeling. Repeat with the other two strokes, picking up more Gel-Lacquer if necessary. Allow it to dry completely before repeating with a second (or third) coat. Using thin layers and allowing ample drying time will keep the Gel-Lacquer from smudging.
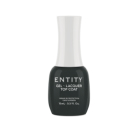
Finish With Top Coat
Entity Gel-Lacquer Top Coat is your ultimate secret weapon against chipping and peeling, plus it adds amazing shine. The unique blend of oligomers and photo initiators in the Gel-Lacquer Top Coat lock onto color for up to 10 days of wear and a gel-like shine. Unlike with the Gel-Lacquer Base Coat and Color Coat, you can be a bit more generous with your Top Coat application. Start with a moderate amount of Top Coat on your brush, wiping any excess on the edge of the bottle. Then “float” the brush over your nail — in other words, don’t push down too hard — ensuring that you cover the entire surface. Don’t forget to cap the free edge of your nail; this will help ensure that there is a nice seal to the edge of your nail and inhibit chipping.
Be Mindful of Drying Time
Patience is key when it comes to drying nails — and a fully dry manicure is going to last the longest. Allow each layer to dry completely before proceeding with the next, and once finished with Top Coat, give your nails ample time to dry otherwise your risk smudging.
Caring for Your Manicure
Perfecting your Gel-Lacquer application technique is only half the battle when it comes to chipping; caring for your nails after is just as important. First, make sure to apply cuticle oil to your nails every day. Moisturized nails are less likely to become brittle and will allow the nail to bend and move with the Gel-Lacquer coating, keeping them from chipping and breaking. Second, whenever doing household chores, like washing dishes or cleaning, wear gloves to protect you nails from water, harsh chemicals and abrasive surfaces that will threaten the wear of your manicure. Lastly, never use your nails to open packages or to scratch surfaces. Remember, your nails are jewels, not tools!
Products mentioned
 GEL-LACQUER BASE COAT
 GEL-LACQUER TOP COAT
 SOAK OFF TOP COAT
 DUAL ENDED PUSHER